


Do you want to install a commercial ice machine correctly? It is important for reliable ice production. This also helps in efficient operation & long-term performance. Are you setting up you equipment in a café, restaurant, bar, hotel, or commercial kitchen? Then, proper commercial ice machine installation requires more than only setting the unit & plugging it in. You need to consider the location. Also, think about ventilation, water supply, drainage, electrical connections, leveling, & manufacturer requirements. Then, put the machine into service.
This ice machine installation guide explains the key steps. These are vital for setting up a commercial ice maker. This guide points when professional plumbing or electrical help may be needed.
What Are the Commercial Ice Machine Installation Requirements?
Don’t randomly step up a commercial ice machine. First, you need to inspect the proposed location. Then, confirm that it meets the requirements for your exact model.
Online Ice Machines recommends keeping electrical, drainage, & water connections approximately 1.2 metres of the machine. The required water pressure for its range is between 0.1 MPa & 0.6 MPa. Still, requirements can vary between models.
Important checks are:
- Sufficient floor or counter space for the machine
- Adequate ventilation & servicing clearance
- An apt drinkable water connection
- Suitable drainage
- Right current supply
- A stable & level setting up surface
- Appropriate ambient temperature
- Easy access for upcoming cleaning & maintenance
Always check the installation manual. It is usually supplied with your particular machine. Do this before starting work. Also you will get more information about what are the commercial ice machine installation requirements.
Step 1: Choose the Right Location for Commercial Ice Machine Setup
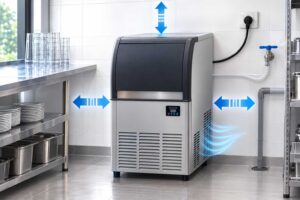
Location is one of the most important parts of commercial ice machine setup. Choose a clean, dry & well-ventilated area. This is where the machine can work without any issue.
An ambient temperature is between 10°C and 35°C for such machines. We advise against installing an ice maker inside a cool room. Also, it must not be inside a cupboard or enclosed space. Adequate clearance should also be left around the unit. This helps in ventilation & servicing.
Before moving the machine into position, keep a track of:
- The machine’s width, height & depth
- Doorways and access paths
- Available service clearance
- Distance to water and drainage connections
- Distance to the electrical supply
Are you planning ice machine installation Melbourne or elsewhere in Australia? Then, you need to check site conditions. Do this before delivery can prevent setting up delays.
Step 2: Check the Water Supply
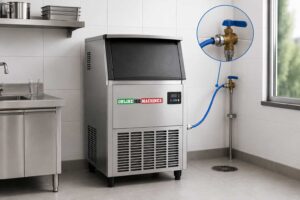
Most commercial ice makers require a suitable water supply to make ice. Don’t connect the machine. Firstly, check the manufacturer’s specifications for water pressure. Then, keep an eye on connection size & water quality.
A suitable water filter may also be highly beneficial. Water filtration can help reduce mineral deposits. This is also going to support consistent ice quality & machine performance.
When making the water connection ready:
- Confirm the water supply is valid for the machine.
- Make sure an accessible shut-off valve is accessible.
- Check that the water line is not blocked.
- Use right fittings & connections.
- Follow the manufacturer’s instructions for the inlet connection.
- Check all connections for leaks. Then, go for operating the machine.
The connection requirements can vary between models. So, people should not think that every commercial ice maker uses the exact same setup.
Step 3: Install the Drainage System
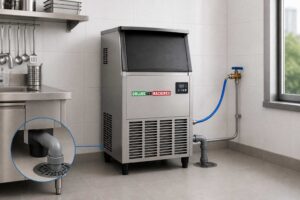
Drainage is another essential part of commercial ice maker installation. Ice machines can produce wastewater during normal operation. Also, it can occur during harvesting and cleaning cycles. Thus, the water needs the right path to a drain.
Drainage may use a gravity drain or a pump-out system. But this depends on the machine & site. Online Ice Machines notes that commercial ice makers require drainage. We also know that the appropriate solution hinges on the machine & setup framework.
Are you planning the drain? Then follow these:
- Position the drain outlet close to the machine
- Follow the manufacturer’s drain instructions.
- Avoid bends & restrictions.
- Confirm that wastewater cannot flow back toward the machine.
- Confirm that the installation applies with suitable plumbing necessities.
A qualified plumber should handle plumbing work. He will follow Australian regulations, & assess the site conditions.
Step 4: Position and Level the Ice Maker
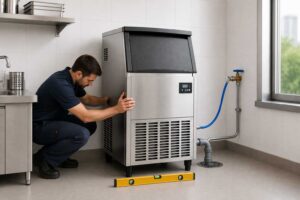
Firstly, the water & drainage arrangements need to be prepared. Then, people must carefully move the ice maker into its last position.
The unit should sit on a stable & level surface. An uneven machine can experience unnecessary vibration. It may not operate as wished for.
Use a spirit level. This way, you can check the machine from multiple directions. Does the model have adjustable feet? Then, you need to make the necessary adjustments. Do this until the unit is leveled correctly.
People need to leave enough room around the machine for:
- Air flow
- Cleaning
- Part examination
- Filter substitution
- Future servicing
Do not push the machine tightly against walls/other equipment. Do this only if the manufacturer allows it.
Step 5: Connect the Electrical Supply
Electrical requirements vary according to the model. So, people must check the machine’s specification plate & installation manual. They need to do this before connecting it.
Always cross-check-
- Voltage necessities
- Amperage requirements
- Plug arrangement
- Circuit necessities
- Earthing demands
- Any specific circuit requirements
The electrical connection should comply with applicable Australian electrical standards & local requirements. Where electrical work is required, use a licensed electrician. Do try attempting a complex connection yourself.
Correct electrical set up is a critical part of commercial ice machine installation. This is because an inappropriate power supply can ruin performance. Plus, this can create safety risks.
Step 6: Check All Connections Before Starting
Before switching on the machine, inspect the entire installation.
Check the:
- Water inlet connection
- Drain connection
- Electrical connection
- Machine position
- Levelling
- Ventilation clearance
- Water filter, if fitted
Turn on the water supply. Then, carefully see the connection points. See if there are any leaks. Do you notice water collecting underneath? Or is it around the machine? Then, you need to stop & investigate the problem. Then, you can start the actual operation.
Spend a few minutes to check the installation. This way, you can prevent avoidable water damage & extra problems.
Step 7: Start and Test the Commercial Ice Maker
Fist, the installation needs to be successful. Then go through the manufacturer’s start-up procedure.
The early test needs to confirm-
- Water gets inside the machine correctly.
- The machine starts like the way it should.
- There are no strange noises.
- No water leaks are there.
- Drainage works properly.
- The machine starts making ice.
- The ice appears steady with the manufacturer’s specifications.
Do not judge the machine’s performance from a single cycle alone. Production capacity can depend on ambient temperature, water temperature & the specific model.
The machine may not operate as expected. Then, you need to see the manufacturer’s manual. Or you can call a qualified technician. No need to keep on restarting it time & again.
Step 8: Clean and Maintain the Machine After Installation
Learning how to install an ice maker is only the start. Regular cleaning & maintenance are also very important.
The machine should be cleaned. It needs to be sanitized according to the manufacturer’s recommendations. Online Ice Machines advises specialized cleaning & sanitizing regularly. We know that more frequent attention is required in environments with higher dust levels or harder water.
Routine maintenance can comprise-
- Cleaning the ice bin
- Sanitizing food-contact surfaces
- Checking water filters
- Checking water and drain connections
- Cleaning condenser parts
- Checking for unusual sounds/reduced production
- Scheduling professional servicing
A well-kept machine can provide dependable ice production. It can also have a longer service life.
Common Mistakes to Avoid When You Install a Commercial Ice Machine
Even a quality machine can experience problems. So, business owners need to do the installation in the best possible way. Some common mistakes are:
Installing the Machine in an Enclosed Space

Ignoring Drainage

Using the Wrong Water Connection

Forgetting to Level the Machine

Connecting to an Unsuitable Power Supply

Skipping the Final Leak Test
Can You Install an Ice Maker Yourself?
Do you have a simple self-contained unit? Then, setup can be pretty straightforward. However, commercial ice maker installation often involves water. Plus, there can be drainage & electrical connections. These may require qualified installers.
Do you have needs for plumbing or electrical work? Then, it is safer & more appropriate to have the work done by qualified men. You should also follow the manufacturer’s installation instructions. Thus, you can protect machine performance & warranty requirements.
For a business set up, professional assistance can be particularly useful. This is when the site needs new plumbing, drainage, electrical circuits, etc.
Final Checklist for Commercial Ice Maker Installation
Don’t put your machine into regular service. Firstly, confirm that-
- The machine is set in an apt surrounding
- Required ventilation clearances are maintained
- The unit is level and stable
- The water supply is connected the right method
- The drainage system is fitting
- Electrical necessities have been checked
- No connection have leaks
- The machine starts correctly
- Ice production has been tested
- Cleaning & maintenance requirements are known.
Every person must stick to these steps. These, make the process of how to install a commercial ice machine much more straightforward. Plus, these help your business skip common set up issues.
Contact Online Ice Machines for Commercial Ice Machine Installation Guidance
Still wondering how to install a commercial ice machine? Well, you need to select the right machine & set the installation site. Hence, you can make a significant difference to lasting performance. Online Ice Machines supplies commercial ice machines. These help companies in Australia. We also offer guidance on machine selection. Plus, we can oversee installation requirements & provide constant support.
So, are you planning to install a commercial ice machine? This can be for a café, restaurant, bar, hotel, healthcare facility etc. Contact Us to know more! Also follow us on Facebook, Instagram and YouTube for more updates.
FAQs
Q. How much does it cost to install an ice machine?
Ans: The cost of installing an ice machine can vary It depends on the machine type. Plus, the existing water, drainage, & electrical connections are also deciding factors in this. A straightforward installation may cost less. Meanwhile, additional plumbing, drainage, or electrical work can increase the overall pricing. For an accurate estimate, it is best to have the installation requirements discussed beforehand.
Q. Can I install an ice maker myself?
Ans: Some basic setup tasks may be possible. Still, commercial ice makers often require water, drainage, & electrical connections. If plumbing or electrical work is needed, it must be finished by licensed professionals. Always follow the manufacturer’s installation instructions. Then, you can confirm safe operation. Plus, you will be able to save the machine’s performance and guarantee.
Q. Do plumbers install ice makers?
Ans: Yes, plumbers can install the water supply & drainage connections. Still, electrical work is generally outside a plumber’s scope. It must be handled by a certified electrician. Depending on the site, a commercial ice machine set up may demand both plumbing & electrical help.
Q. Do ice machines need to be plumbed in?
Ans: Most commercial ice machines require a connection to a potable water supply. They also need a suitable drainage system. They also need an appropriate electrical supply. Exact requirements vary by model. Hence, people need to check the manufacturer’s specifications. Then, they can opt for installation. This way, they can confirm that the site is good to go.